
Learning how to make a dropdown menu in WordPress is one of the best ways to increase site engagement and improve the user experience.
Today we’re going to look at how to make a dropdown menu in WordPress the easy way, so you can give your site visitors the key to exploring your website. As a result, you’re bound to see an increase in pageviews, a boost in conversions, and a jump in sales.
Want to skip ahead? Go ahead and use our table of contents:
- What is a Dropdown Menu?
- Why Use a WordPress Dropdown Menu
- Check for Dropdown Menu Support
- Create a Navigation Bar for Your Site
- Add Top Links to Your Dropdown Menu
- Add Sub-Items to the Dropdown Menu
- Wrapping Up
So, let’s get started!
What is a Dropdown Menu?
A dropdown menu is a link on your website that’s located on a navigation bar. When you hover over it, it expands to show sub-items that site visitors can click on.
Here’s an example of what a dropdown menu looks like on the Design Bombs home page.

In the example above, Design Bombs is using the “Start Here” dropdown menu to display a few points of interest a new user may have on the site. These links lead to articles on their website that people are likely to want to read.
This is just one of the ways you can use dropdown menus on your website.
When getting started with WordPress, it can be overwhelming. Learning how to do things like create dropdown menus can be difficult. And like most things in life, you can either do things the easy way or the hard way.
The hard way, which is trial by fire, is what I did when I first started.
That said, the easy way is to follow this beginner’s guide and make a dropdown menu in WordPress quickly and efficiently.
Why Use a WordPress Dropdown Menu
When creating a WordPress blog, you’ll often create categories that break your website into different sections. Creating a WordPress dropdown menu allows you to showcase these categories without overwhelming your navigation bar or your site visitors.
It also helps guide people through your website with ease.
Here’s an example of Design Bombs using a dropdown menu to organize its categories:

Using a dropdown menu helps you display a lot of information in a limited space without cluttering your website. Thanks to its collapsible nature, a dropdown menu will only show users links to other places on your website they’re interested in and actively seek out.
Now let’s take a look at how to make a dropdown menu in WordPress.
Step 1: Check for Dropdown Menu Support
By default, WordPress comes with all the tools you need to build dropdown menus. However, you still have to make sure your theme can display them on the frontend of your site.
While most themes support dropdown menus, it’s important to note that some don’t. That’s why it’s always a good idea to make sure your theme does before getting started.
No one likes spending their time building a dropdown menu only to find out that it can’t even be displayed! That’s super frustrating!
The easiest way to tell if a theme supports dropdown menus is by checking the theme’s live preview right from the backend of your website.
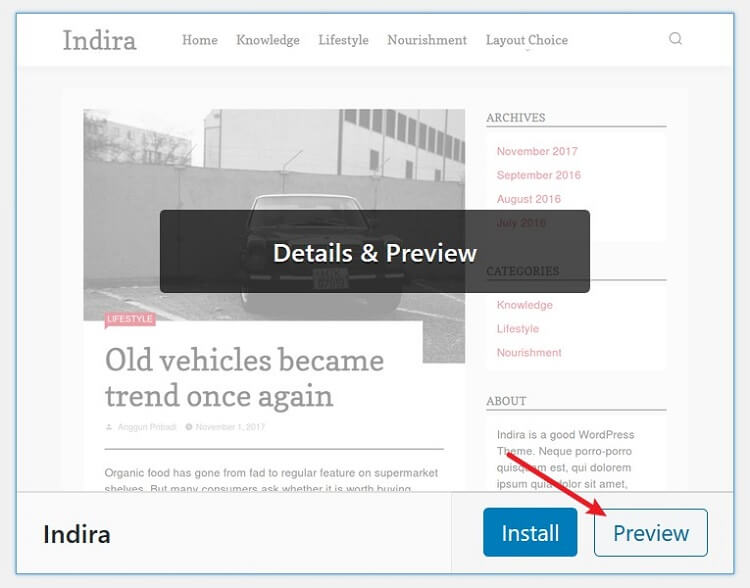
You can also check the theme’s details and see if it lists dropdown menu support in its feature list.
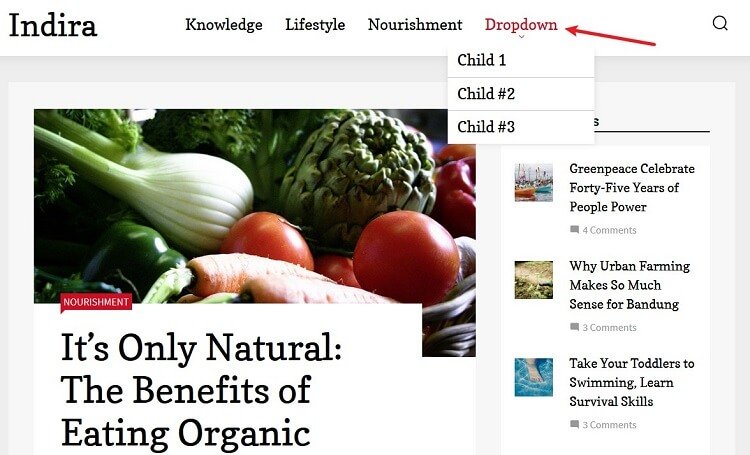
Still not sure you can make a dropdown menu using your current theme? Then hop on over to the theme’s official website and check out the live demo display. Here you’ll really be able to see whether your theme support dropdown menus in the navigation bar or not.
In addition to many free WordPress themes out there, Divi is one of the most popular, easy to use premium WordPress themes in the market that happens to support dropdown menus.
Step 2: Create a Navigation Bar for Your Site
For this tutorial, we are creating a new navigation bar. That said, you could always use an existing one and just skip ahead to where you make a dropdown menu in WordPress.
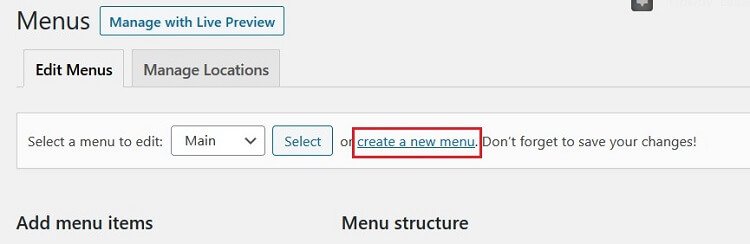
To create a navigation bar, you’ll want to go to your WordPress dashboard first. Once there, go to Appearance > Menus. Here, you should see a link named “create a new menu” toward the top of the page. Click this link.
Next, give your navigation bar a name. Keep in mind, only you and other site admins will see the menu name. I suggest giving it a name that helps you identify what the menu does. For example, something like “Dropdown Menu.”
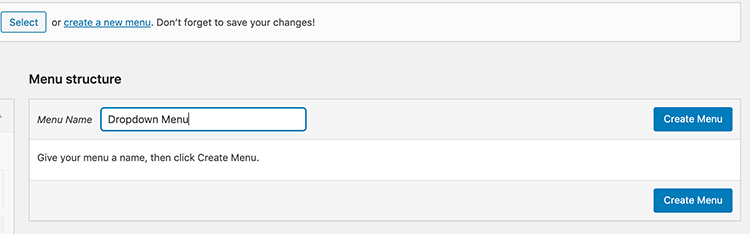
Next, click the Create Menu button.
Step 3: Add Top Links to Your Dropdown Menu
Now it’s time to add the top links to your newly created dropdown menu. These will be the items that appear in the top row of your dropdown menu. For example, Home, Contact, and About Us, and Shop (for an online store) are some common top links seen on websites.
As you can see with Design Bombs, the top links include Categories, Start Here, Deals, and Glossary.

To start, go to Appearance > Customize > Menu in the WordPress dashboard. This will bring you to the theme customizer that lets you make changes to your website and view them in real time before publishing them.
Click on + Add Items to add top links to your dropdown menu. When you do, you’ll see the available top links.
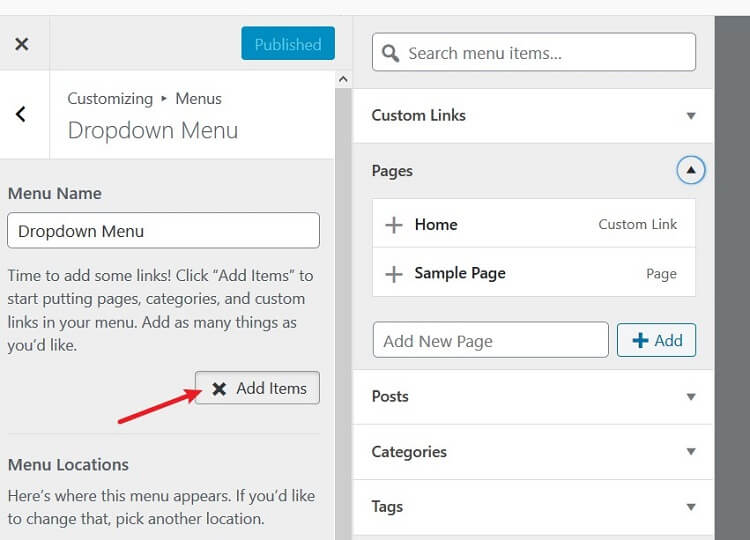
For this example, we’ll add a Home top link to the dropdown menu by clicking Add. This will transfer the top link to your dropdown menu.
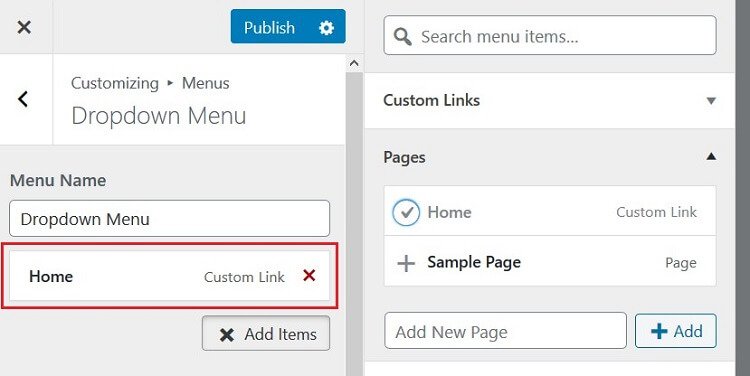
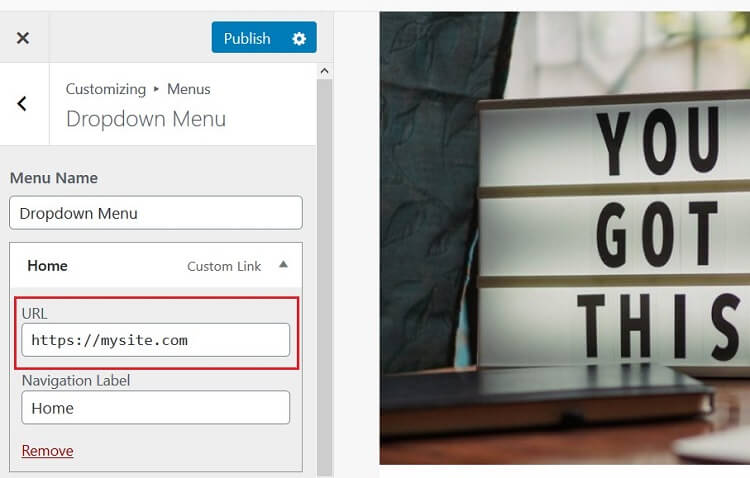
To make sure your Home top link works in your dropdown menu, click on Custom link to add your site’s homepage URL. This way, any time someone clicks on the Home dropdown menu item, they are redirected to your site’s homepage.
Make sure you scroll down a bit and choose the right section on your website to place the dropdown menu and top link. For example, we are making sure our dropdown menu is in the primary section near the header of our website.
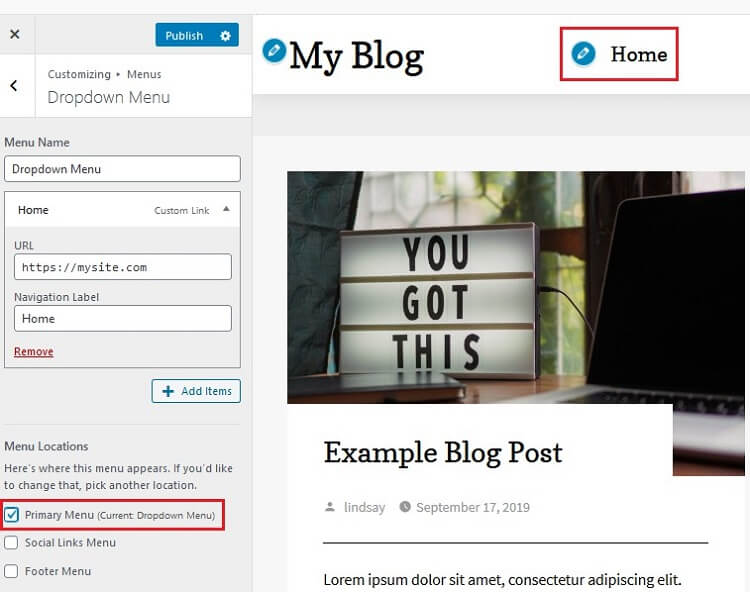
You’ll see the new top link in the preview section of the customizer.
Step 4: Add Sub-Items to the Dropdown Menu
Sub-items are links that belong to the parent, or top link you just created. Utilizing these sub-items is how our dropdown menu works in WordPress.
When you create sub-items and add them to your top links, they’ll display upon hover or expand when someone clicks on them.
The first thing you’ll need to do is go to Appearance > Menus in the WordPress dashboard. You should see your dropdown menu there since you just created it in the theme customizer.
From there, click on the posts, pages, categories, etc. that you want to add to the top link of your dropdown menu. Then click Add to Menu.
For this example, we’ll add our sample page.
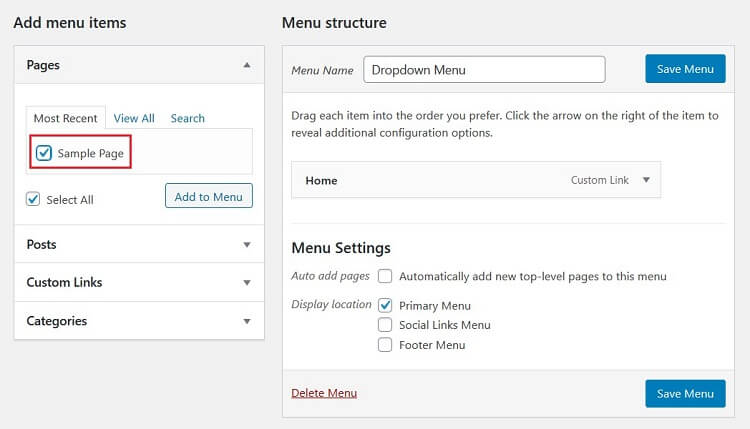
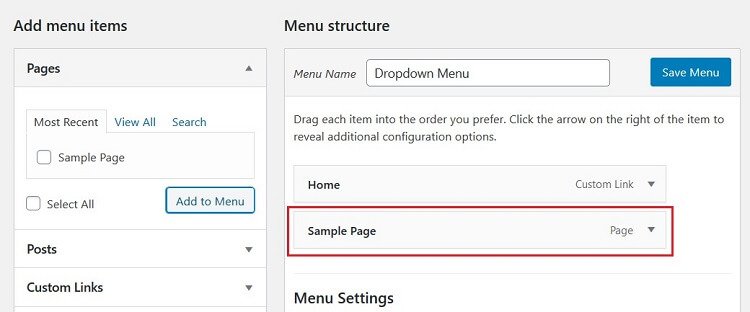
But that’s not enough. When you click Add to Menu, the option you choose simply appears as a regular menu item. And we’re looking to create sub-items in our dropdown menu, not create additional top links.
To fix this, just drag the sub-item to appear underneath the top link. It will look something like this:
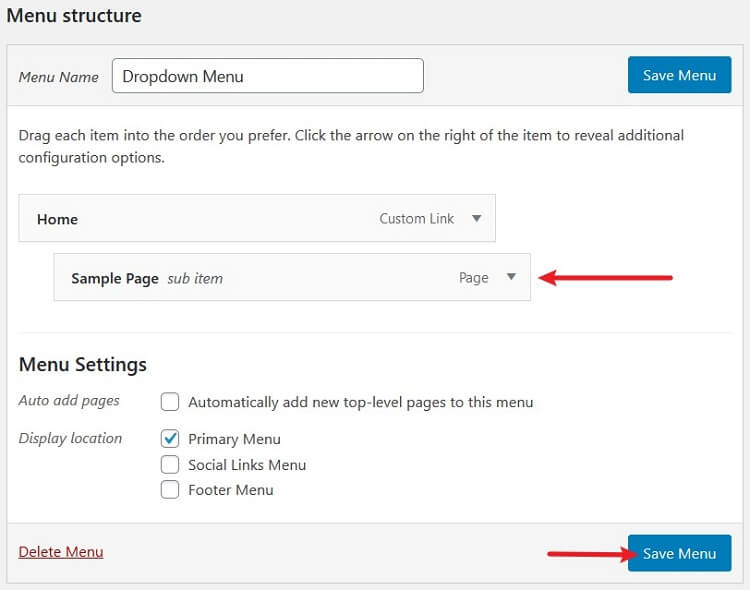
Notice how the sample page now says sub item and appears underneath our Home top link.
Click Save Menu to save your changes. Now you can preview the frontend of your website and see your newly created dropdown menu.

Wrapping Up
And there you have it! You now know how to make a dropdown menu in WordPress to improve the navigation of your website and provide a better user experience for those exploring what you have to offer.
In addition to making it easier to navigate your website with a dropdown menu, be sure to check out our complete guide to content delivery networks, so you can speed up your website’s loading times and ensure people don’t abandon your site because it’s too slow.
Have you ever needed to make a dropdown menu in WordPress? What kind of top links and sub-items did you add? We’d love to hear all about it in the comments below!